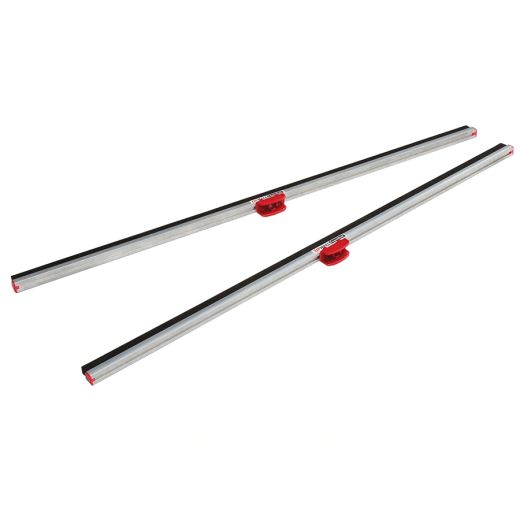
ZipWall® FoamRail™ Cross Bars
Product Highlights
- Creates an extremely tight seal without the need for tape
- For use with ZipWall Poles or Side Clamp Wall Mounts
- Includes T-clips
Product Description
The FoamRail Cross Bars works with ZipWall poles or wall mounts to create an extremely tight seal by pushing its foam edge against the plastic and the ceiling, floor, or wall.
Each rail is 4 feet long and is made of strong, lightweight aluminum. The spring-loaded pole or wall mount holds it in place. It takes just seconds to install without damaging a thing.
Poles are not included with the cross bars.
The T-clip is used to attach the cross bar to the bottom or top of the pole. Each package comes with 2 T-clips.
The FoamRail cross bars push the plastic or barrier material against the ceiling but are not designed to create the barrier. Build the barrier first with additional poles and then add the cross bars and poles to support them.
Package includes:
- Two (2) four foot FoamRail cross bars
- Two (2) T-clips
Product Description
Technical Specifications
| Primary Stock Status | Managed Inventory Standard |
|---|---|
| Length (ft.) | 4 |
| Category | Barrier Systems |
| Brand | ZipWall |
| Flame Retardant | No |
| Condition | new |

Usage
Installing the FoamRail
Set up your barrier. Set up a ZipWall barrier in desired configuration. Allow four extra inches of plastic to overlap the head at the top of each pole.
Each FoamRail requires the use of one ZipWall pole and jack with the head and plate removed. Simply pull the head straight up and off.
Set up the FoamRail. Holding the T-Clip in your hand with the socket away from your palm, squeeze the clip open. Place the FoamRail into position and release the pressure. The T-Clip will grab the FoamRail.
Attach the T-Clip to the FoamRail approximately where the label is to center it. The T-Clip will fit anywhere along the FoamRail.
Snap the T-Clip and FoamRail on the ball at the top or bottom of the ZipWall pole. Now, with the FoamRail attached to the pole, raise it into place, pressing the plastic barrier against the ceiling and/or floor.
Fits any length. With multiple FoamRails you can seal any span. The FoamRail easily overlaps each other allowing you to adjust to any barrier length.
Customize. If you need to create a custom length of FoamRail, cut the aluminum and foam to the desired size using a hacksaw. Remove the plastic end from the discarded length of FoamRail by pulling it straight out using pliers. Then press this plastic end into the newly cut FoamRail.
Using the ZipWall SideClamp Wall Mount.
First, set up a plastic barrier using the ZipWall barrier system. At the wall end of the barrier place a pole so that the top plate touches the wall at the ceiling, and at the floor the pole is no more than two inches away from the wall. Use a Grip disk as needed. Also, allow an extra foot of material at each wall.
Attach the SideClamp wall mount to the FoamRail by pressing the thumb release. Place the FoamRail into Side Clamps's rail catch and release thumb pressure. To center the SideClamp on the rail, place at the FoamRail label.
Put the SideClamp and FoamRail into place. Open the SideClamp by squeezing the handles together, as shown. While clamp is open, place the FoamRail between the plastic barrier and the pole moving the clamp so that the curved rubber end is between the pole and wall. Release the pressure allowing the rubber end to grasp the pole. This will then push the FoamRail against the plastic barrier and the wall.


