WRITTEN BY: JESIKA ST. CLAIR OF KRETUS®
“I just don’t get it,” says a confused contractor staring in disbelief at a concrete coating installation covered in what looks like giant zits. Or tiny geysers? All erupting with water—a coating failure if ever you’ve seen one.
The contractor needs to find out what (or who) is to blame—and fast. Because this fix won’t be cheap. They read through installation reports, looking for anything that seems amiss. But there’s nothing:
- The materials were thoroughly mixed, and always in clean buckets.
- They had a knowledgeable crew. New application tools. They even wore the right shoes.
- They tracked relative humidity, watched ambient temperatures, adhered to the dew point calculation chart throughout the installation.
“The concrete was dry when we installed the coating,” the contractor says.
And yet, this happened:
So what went wrong? The applicators got the installation right, but they forgot a crucial step in concrete prep work: concrete moisture testing.
Proper concrete moisture testing could have revealed the nefarious gas lurking beneath the surface. The gas that led to failure. The gas responsible for nearly all coating failures: moisture vapor.
CONCRETE MOISTURE VAPOR: A GASSY TRAVELER
Most people know that you need water to make concrete. What many don’t know is that concrete remains moist, even when it appears dry at the surface. It’s permeable, so it allows gases—like moisture vapor—to travel through it.
The gas’s ultimate goal isn’t to ruin coatings. Moisture vapor wants to remain vapor. It’s simply a traveler rising through the pores of the concrete to evaporate into the atmosphere where it will continue its journey, gassy and free.
In the case of the erupting coating, the vapor couldn’t pass through. It had to condense into a liquid, its less-favorite state, to create enough pressure to break through the coating and evaporate into the sky.
TESTING, TESTING, 1-2-3
To find out which coatings can—or can’t—withstand the pressure of this gassy traveler, three concrete moisture tests are first required: calcium chloride, in-situ probe, and, though not technically a moisture test, the Schmidt rebound hammer. Performing these tests may seem like a hassle, but when compared to the amount of energy it would take you to install (and later remove) a doomed-to-fail coating, these tests are easy as pie.
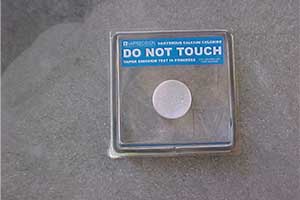
ASTM F1869: A calcium chloride test measures how many pounds of water evaporate from 1,000 square feet of the slab per day. This measurement is called the Moisture Vapor Emission Rate (MVER).
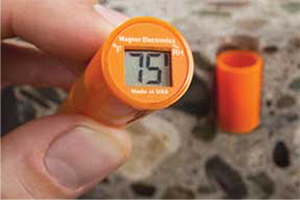
ASTM F2170: In-situ probes are used to detect how much moisture, or relative humidity (RH), is in the concrete.
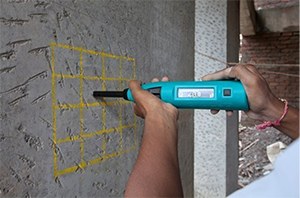
ASTM C805: The Schmidt hammer measures rebound values. Low values may indicate high moisture content or other issues lurking below the surface.
ALL WILL BE REVEALED
What exactly do you do with all these concrete moisture test results once you’re finished? Well, the MVER and RH levels are important indicators of which coatings not to use. For example, thin-set coatings, like KRETUS® Polyaspartic 92 Low Odor and Polyurethane HS, should only be installed when the MVER is under 3 lbs and RH is less than 80%.
Thicker applications, like KRETUS® Top Shelf® Epoxy MVR and Urethane Polymer Concrete SL, MF, or TT, can handle high levels of moisture—up to 25 lbs and 99%.
And for levels that fall between extremes, KRETUS® Urethane Polymer Concrete RC (15 lbs, 99%), a non-MVR Top Shelf® Epoxy (8 lbs, 80% RH), and WB Epoxy (5 lbs, 80%) are all good choices.
As for the other test, Schmidt hammer results may indicate bigger problems associated with moisture vapor…
PASSING GAS: NOT THE ONLY PROBLEM
So now we know that moisture vapor likes to travel through concrete to get to the surface, but it doesn’t always travel alone. Along for the ride come chloride, hydroxyl ions, sulfates, and other chemical compounds that can destroy concrete through chemical reactions that are way too complicated to get into here.
Here are just a few examples of the damage these hitchhiking compounds can create as well as solutions recommended by our experts. Keep in mind that each of these coating failures could have been avoided with some investigation, experimentation, and testing (although then we wouldn’t have cool photos to illustrate how important moisture testing is!).
ASR, AKA “CONCRETE CANCER”
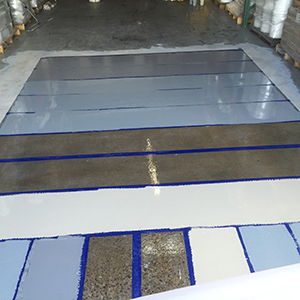
In the case of the first photo, it was ASR (alkali-silica reaction). And only a ¼-inch-thick coat of KRETUS® Urethane Polymer Concrete MF could solve this problem. But before UPC came in to save the day, an entire epoxy floor was installed and quickly failed.
Contractors get smart quick, and rather than installing an entire floor this time, they tested in small areas, installing five different epoxies.
Every. Single. One. Failed.
But it wasn’t a total loss. The experiment saved them the time, money, and effort of replacing one failed system after another. Like the Schmidt hammer test, creating a mock-up—testing the system on a small area of the concrete before the installation—sometimes reveals other moisture issues.
Six epoxy failures baffled the contractor. Why wasn't epoxy adhering to the concrete? To find out, they reached out to experts in core testing. Cores were extracted from the concrete and sent to a lab for testing.
Core tests revealed that there were high levels of ASR—epoxy wasn't ever going to work. Contractors then turned to urethane cement, tested it on site, and installed 1/4-inch-thick KRETUS® Urethane Polymer Concrete MF. Six years later, the floor looks good as new.
The Tropic of Cancer: A garage floor suffers from ASR, commonly referred to as “concrete cancer.” Six different epoxy coatings were tested—all failed.
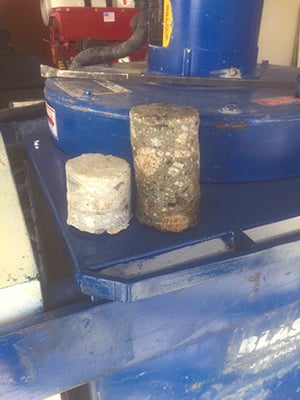
ASTM C42: Cores extracted to test for chemical reactions, like ASR, that negatively affect coating adhesion.

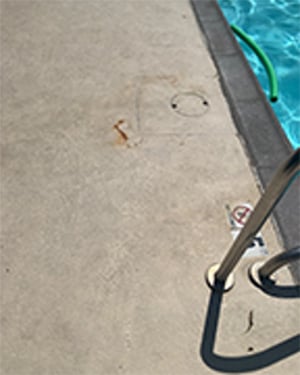
Oxide jacking, or rust bursts, blemish a pool deck’s protective sealer.
THE RUST BELT
This rusty pool deck never stood a chance. Chlorinated water and steel rebar do not mix. Or rather, when they do, they bring on the rust.
This poolside is an example of when the Schmidt rebound hammer test can come in handy.
Hammer tests return rebound numbers. High numbers may indicate that rebar was used to reinforce the concrete. Low numbers can point to high moisture content or weakness in the concrete surface—increasing the potential for surface cracks. Cracks, of course, allow moisture (or chlorinated water) into the concrete.
If the contractor had known about the rebar, they could have installed a rust inhibitor first, lessening the risk for rust. Had they known the concrete surface was weak, they could have resurfaced it with urethane cement.
To solve this one, experts advised the contractor to saw cut and chisel out the affected areas to reveal the rusted rebar beneath. They treated the rebar with a rust converter. And after patching those areas with KRETUS® Urethane Polymer Concrete MF, they prepared the concrete surface once more, applied a rust inhibitor, and re-installed the waterproof coating.
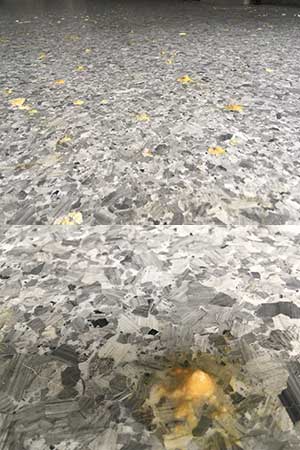
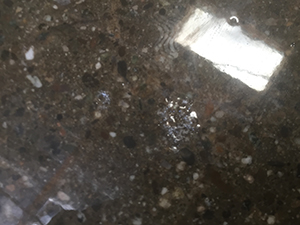
Tiny calcium stalagmites grow through a decorative color chip floor.
MAMMOTH CAVE
Tiny calcium stalagmites grow through a decorative color chip floor.
This color chip garage installation turned into a geographical wonder when calcium deposits in the concrete forced themselves through the coating to create these tiny stalagmites.
Experts advised that this concrete was officially kaput and needed to be replaced. The garage owner was less than thrilled—and presumably will not be recommending the contractor for future jobs, even though the coating failure was the concrete’s fault.
If this had been a large job, say 10,000 square feet, they could have lost thousands of dollars. All because of skipping some concrete moisture testing and a mock-up.
To protect yourself from damages, include concrete moisture testing in your job estimate and contract. Also, make sure your contract protects you from being held liable if the concrete is responsible for coating failure. Not only do you need to know the value of testing, but you should also inform your clients of the potential loss involved if you don't test.
CONCLUSION: TEST, TEST, TEST!
All of the stories are true. Names were not revealed to protect the contractors—who will never again install a floor without moisture testing. They learned it the hard way so that you don’t have to.
Run your concrete moisture tests. And, when you find a coating system that says it can handle the MVER and RH levels of the slab, do a mock-up before you begin the full installation process.
Or—if you’d like to be featured in the next cautionary tale on concrete moisture testing—don’t. We can always use more photos.
HAVE QUESTIONS ABOUT CONCRETE MOISTURE TESTING?
TALK TO THE EXPERTS AT JON-DON!
For concrete jobs big or small, Jon-Don is your one-stop-shop for the equipment, supplies, and know-how you need to tackle each one. We offer a huge selection of resinous coatings from top brands, like KRETUS®, plus same-day shipping and the industry’s best guarantee. Shop online 24/7 at JONDON.COM or call 800-556-6366 to speak with a Concrete Expert today!




Comments